Free shipping on qualifying domestic orders over $50
Soldered Christmas Ornaments
December 23, 2015
As promised, today's post will feature an ornament that is a little more difficult to make, but oh so much fun. Because you know you NEED another hobby, another medium and more tools and stuff to buy! Well, I already had all this stuff laying around, I just happened to unpack it recently, as I haven't soldered since I moved into my new studio.
What you will need:
- A soldering iron
- lead free solder
- flux
- copper tape
- glass microscope slides
- a gelli print or image to go between the glass
- some clips to hold the piece while soldering
- jump rings
Since this is a quick lesson showing you what I did, I will not go into detail regarding the types materials you need. There are some great books and youtube videos that can teach you the basics of how to solder and all the stuff you need to begin.
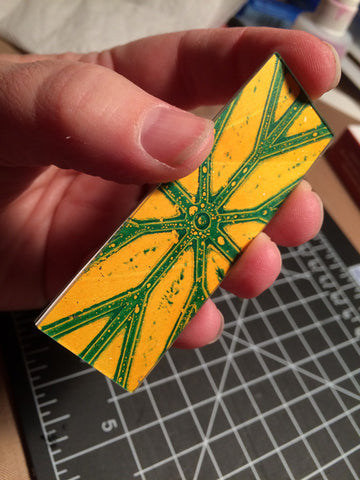
The first thing you want to do is "audition" parts of your prints. I cut a window out of a piece of paper the exact size of the glass slides. I decided to make some designs symmetrical, some abstract, and created little collages on the flip sides of some.
Cut out the design and put it between the two pieces of microscope glass.
Now, without getting too many fingerprints/oils on the edge of the glass, carefully center it on the copper tape so it will wrap around to both of the sides. It will look like this.
With the back of a spoon or bone folder, burnish the copper tape down all around, trying to miter the corners so it all lays nice and flat and adheres to the glass.
Here are all the designs I made, wrapped in copper tape and ready to solder.
Heat up the soldering iron and clip your glass so you don't have to hold it with your hand. Trust me you DO NOT want hot solder to drop on your skin. Unless you like third degree burns and scarring. (No, not even funny.) You MUST brush flux on the copper tape or the solder won't stick to the copper. Put the tip of the iron on the end of the solder wire and after a second it will melt on the tip and you can drip it on the edge of the piece. Slowly pull the iron along the edge and the solder will follow. (ooh. Look at the piece in the background. You can see my butterfly wing between some glass, being made into a pendant!)
Continue around the front and back edge the same way, picking up more solder as needed.
When you have half the piece done, let it cool a few minutes, flip it over and re-clip it, add flux to the parts you need to do next, and repeat the process until you have the entire piece done on all sides, front and back. If you have rough areas or peaks, you can rest the tip of the iron and re-melt it and smooth it out, but remember, perfection is overrated and it looks best lumpy and bumpy and rustic :-)
Adding a jump ring is best shown by someone else, I forgot to take pictures, lol. Basically you put a blob of solder where you want the ring, hold the ring with hemostats or a contraption called a "third hand" and melt the solder around the ring, the ring will sink into the melted solder and it hardens almost immediately and viola! like magic the ring is stuck to the top. (yeah, not really THAT easy! Practice!)
This one has the similar images front and back. It uses an abstract part of one of the Diamonds Series stencils gelli printed. The rest of the images show the fronts and backs of the ornaments. The FAITH one and the abstract one below were made using glass that was a little bigger than microscope slides.


I hope you enjoyed seeing the process. Soldering really is fun, but can be a bit expensive to start up. My dad gave me a lot of my supplies, as he used to make stained glass windows. Yes, I come from a family of artists :-)
I also want to wish everyone a Merry Christmas and Happy New Year!
Leave a comment
Comments will be approved before showing up.


