Free shipping on qualifying domestic orders over $50
Home is where the Art is! -Kirsten
July 27, 2016 2 Comments
Hello Lovelies! I hope your summer has been filled with fun, good food and ART! I also hope you get a chance to "get away" even if it is in your own town. :)
The project I am bringing to you today is one of my favorites. I have had this idea rattling around in the right side of my brain for awhile now.
If you could flip through my sketchbooks you might see a reoccurring theme. Houses. I think every artist has symbols, images, etc. that mean something extra special to them. One of mine is houses. Growing up my family moved often. In fact, I realized recently that I have moved, on average, every 3-5 years my entire life. That is many many houses. One house that has remained constant is my grandparents' farmhouse in Idaho. It is one of my very favorite places on the planet. If you want to read how my very favorite place influences my creativity you can read a blog post I wrote a couple years ago. http://smilingeyestudio.
So, continuing this thought process about home. What does home mean to you? What function does a home have? I am sure it can mean different things at different times of our lives. These are the questions that were going though my mind as I created this series.
I started with three wooden house forms I found at my local craft store and my first layer was GAC-100 by Golden. It is a multi-purpose acrylic polymer that seals the grain of the wood. (Another option for this is clear gesso or you can go rogue and just start painting!)

Using a selection of Dina Wakley acrylic paints I painted each side a different color. Using the same colors on each house will help them have continuity.

Then I grabbed my palette knife, Deco Art Media Crackle paste and the larger Halftone Dots Stencil and applied a medium to heavy layer to each side of the houses. (Tip: The thicker the paste the bigger the cracks.) Some sides were just the dots and others were solid crackle paste. When the paste was dry I went all ooooh and aaaaah at the delicious texture that I saw.

The next layers were paints (same as before) and dictionary pages. I only glued the paper to a few sides of each house. Again, using the same ephemera on each ties them together. (Kinda like Project Runway when they have a group of designers design a mini collection. The successful groups have a common element that appears on each of the designs, whether it is color, pattern, etc.)


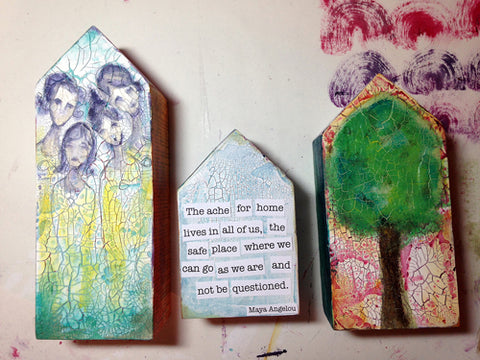
At this point I found a quote I liked and also sketched out some imagery I wanted to paint onto the house blocks. When I looked at the super awesome bumpy surface from the crackle paste I knew it would be a smidge difficult to paint details. So I grabbed my favorite sanding blocks and went to town sanding all sides of the houses. Dust was flying and the result was AWESOME!

All the divine cracks stayed but the overall surface was more flat and so so smoooooth. A bonus was the distressed look I got from the paint partially sanding off too.

Now that my surface was ready I started painting!

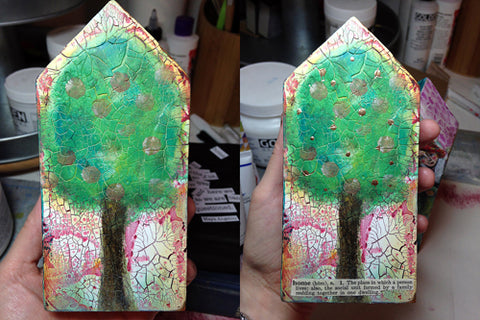
I felt the sides needed something snazzy so I picked out my favorite stencil from the Cathedral Series and it was perfect.

I also used gold paint to add details and the shimmer shine just tied everything together.


The result is a whimsical house set that makes me smile. Mission accomplished!

Save
2 Responses
Linda Wyatt
July 28, 2016
I loooove these whimsical houses, and your step by step photos and directions are terrific.
Leave a comment
Comments will be approved before showing up.


Debbie
August 18, 2016
Ooooh, I love these!!!! I just bought these same houses knowing I’d find something to do with them. Thank you for a wonderful idea. Debbie